The preparatory stage for painting in layers with acrylic
Acrylic paint dries very quickly, so you won’t have much time. Before you start drawing, make sure that your workplace is completely ready:
- put on an apron and cover the work-table with foil;
- prepare jars of clean water, a palette knife and brushes, a wet palette, acrylic paints;
- take unnecessary paper sheets (to remove excess paint) and a rag for your brushes;
- take a primed canvas;
- adjust the light.
The basic rules of acrylic paint layering techniques
- Apply a small amount of paint (about 5 mm in volume) to the palette around the perimeter, laying out a few basic colors with which you will work. Be sure to leave a few centimeters between them to avoid mixing shades.
- When layering acrylic paint, use large brushes to mark the outlines of the largest objects on the canvas with clear lines. It is recommended to do this with opaque matt paints.
- Before moving on to a new color, thoroughly rinse each brush of paint. Be sure to blot a clean brush with a rag so that there is no moisture anywhere.
- When painting in layers with acrylic, be sure to spray your work with clean water from a spray bottle every 10-15 minutes, so that acrylic paints do not dry out before you finish the painting.
- For deeper and more detailed acrylic layering use fine brushes (pointed and detailed round) and choose transparent or semi-transparent colors.
- When the painting is finished, leave the layered acrylic artwork to dry for a day. After that, it can be sealed with acrylic varnish and inserted into the frame.

Tips on how to layer acrylic paint on canvas
- The more water you add to the paint, the lighter and more transparent the brush strokes will be.
- painting is complete, carefully put the leftover unused acrylic paint back into the jars.
- If you need to take a short break while painting, just cover the palette with cellophane.
- To see the pencil sketch, you can add more water to the palette and make a light translucent background.
How to layer acrylic paint on canvas step by step

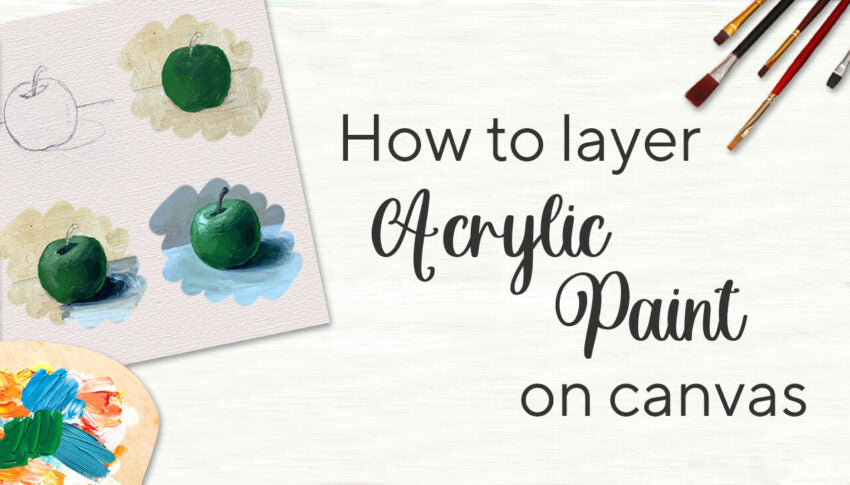
1. Draw a sketch of the picture, having previously determined where the light will fall and where the shadow will be.

2. Optional step: apply a thin layer of ocher diluted with water to the canvas. This will form an auxiliary coat that will show through when layers of paint are applied.

3. Paint the whole apple with the main color.

4. Add partial shade with a darker shade of green.

5. Draw the shadow part of the apple using deeper green color. Try to blend the line between shadow and light to avoid dramatic color transitions.

6. Add the main background color. In this case, the surface on which the apple lies is lighter, since the light falls from above and from the side.

7. Lighten the tone of the top of the apple a little, as the light falls on it from above.

8. At the end add some highlights and paint the tail of the apple.
Final Acrylic layering tips:
- Beginner artists are recommended to draw a sketch with a lead pencil prior to layering acrylic paints.
- Never leave dirty brushes: after drying uncleaned they will become unsuitable for further use.
- Use a spray bottle filled with water to moisten the palette periodically: this way acrylic paints will not dry longer.

